
How to Connect and Configure Shippo in GoHighLevel
Updated August 27, 2024
Managing shipping rates manually across an ecommerce store leads to pricing errors and lost revenue at checkout. By integrating Shippo with GoHighLevel, you'll configure live carrier rates, package templates, and shipping origins so customers see accurate delivery costs in real time.
Step 1: Create Live token in Shippo
Access the live token in Shippo by generating it at: Settings > Advanced > API > Live Token
- Click on generate live token:
- Copy the live token:


Step 2: Setting up Package template & Shipping options in Shippo
Setting up Package Template in Shippo:
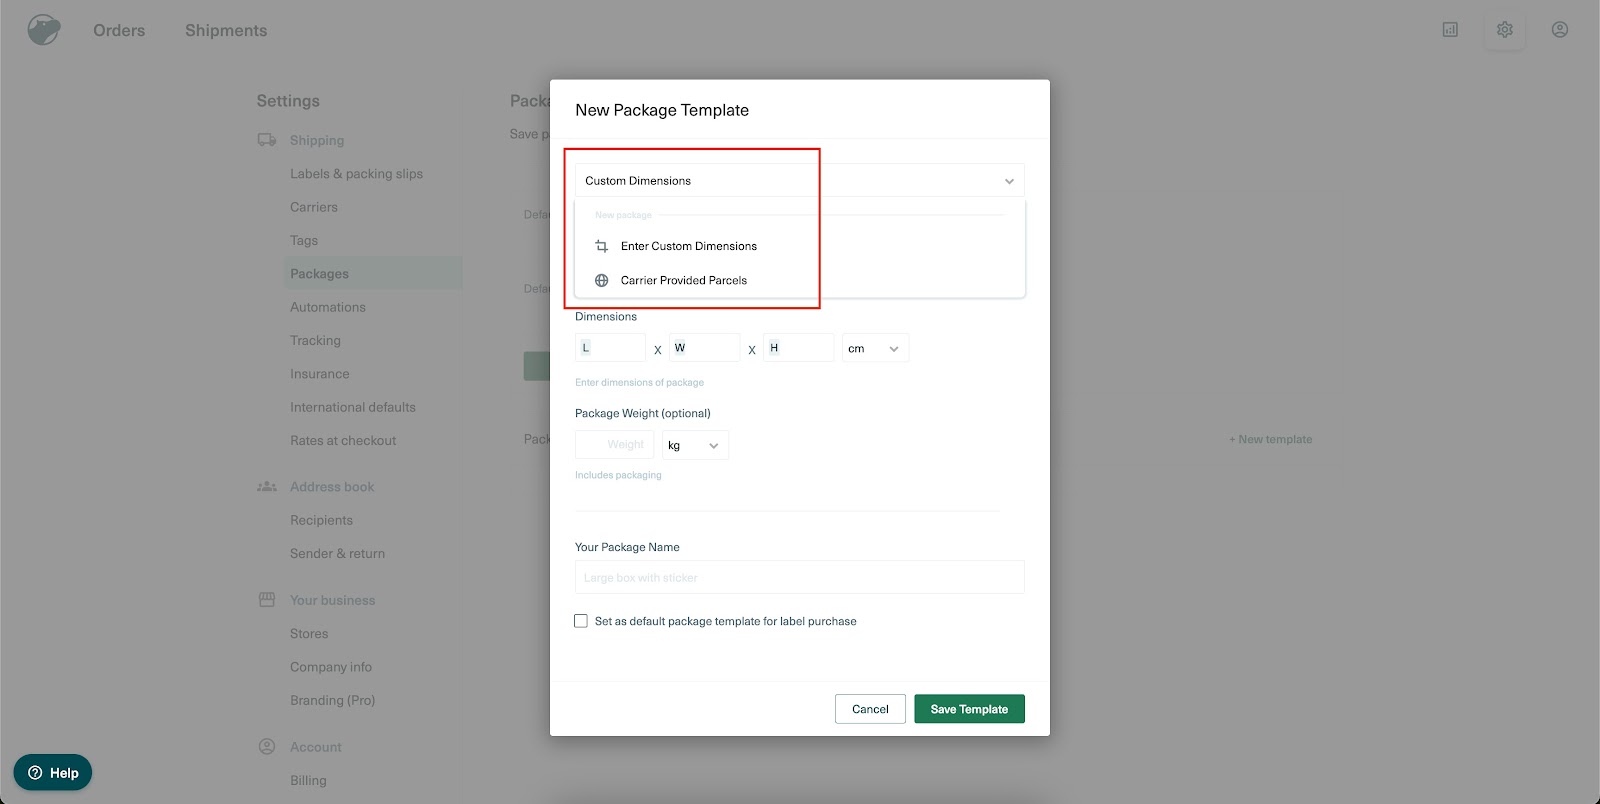
- Package Template can be accessed at : Settings > Shipping > Packages > Add New Template
- Store owners can either add a custom dimensions or choose a standard carrier provided parcel dimension:
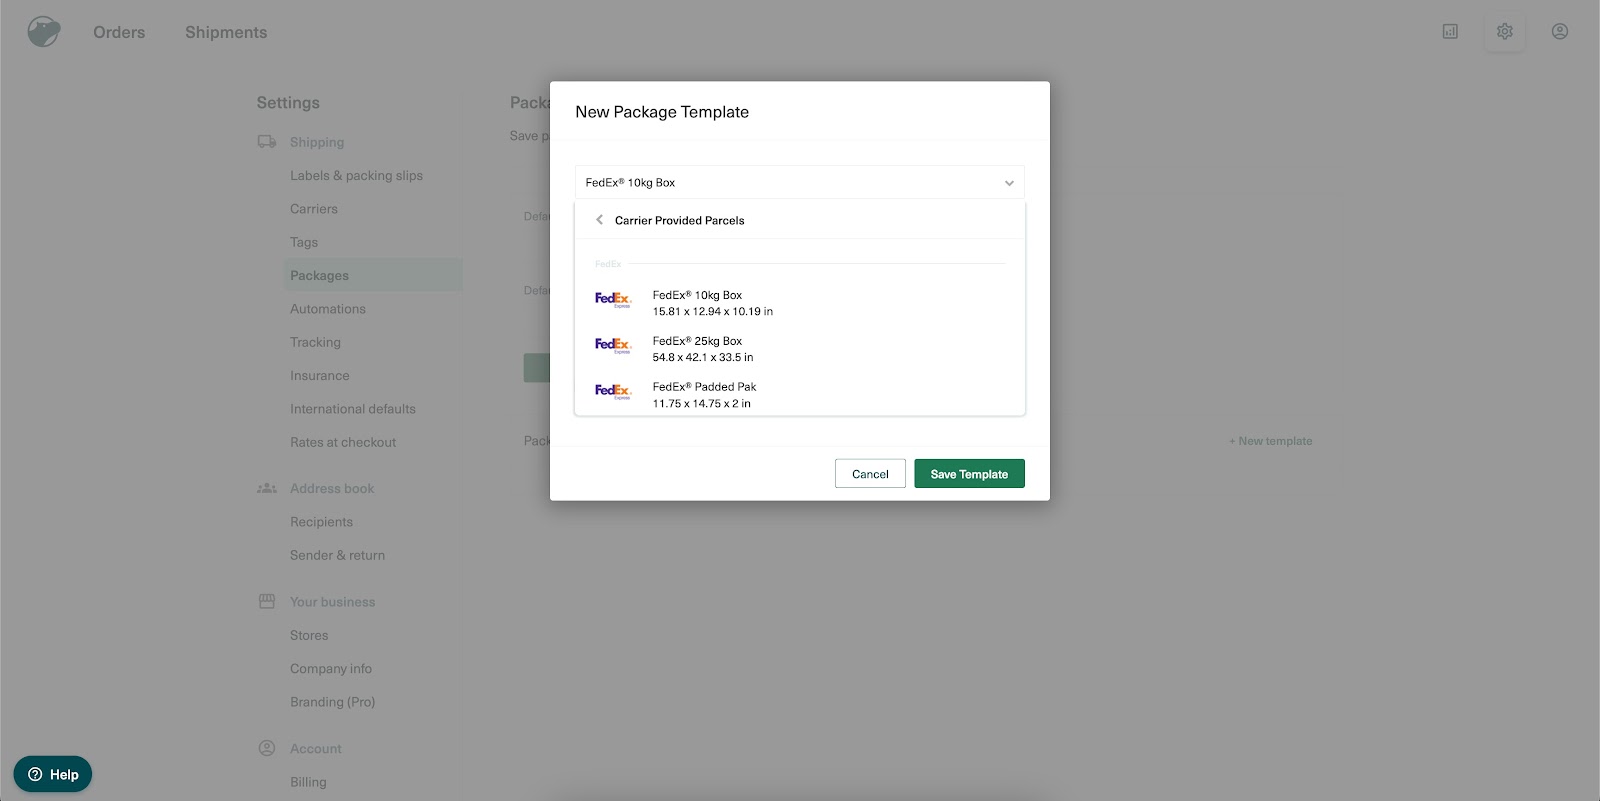
- If standard carrier provided parcel is chosen:
- For the carrier provided parcel, package weights need to be set here. If the current template needs to be set as default, checkbox needs to be ticked here:

Setting up Shipping origin in Shippo:
- Sender & Return address can be setup at: Settings > Address book > Sender & return > Add New address
- Add the complete address and select default sender and return address(if needed):

Setting up Shipping options in Shippo:
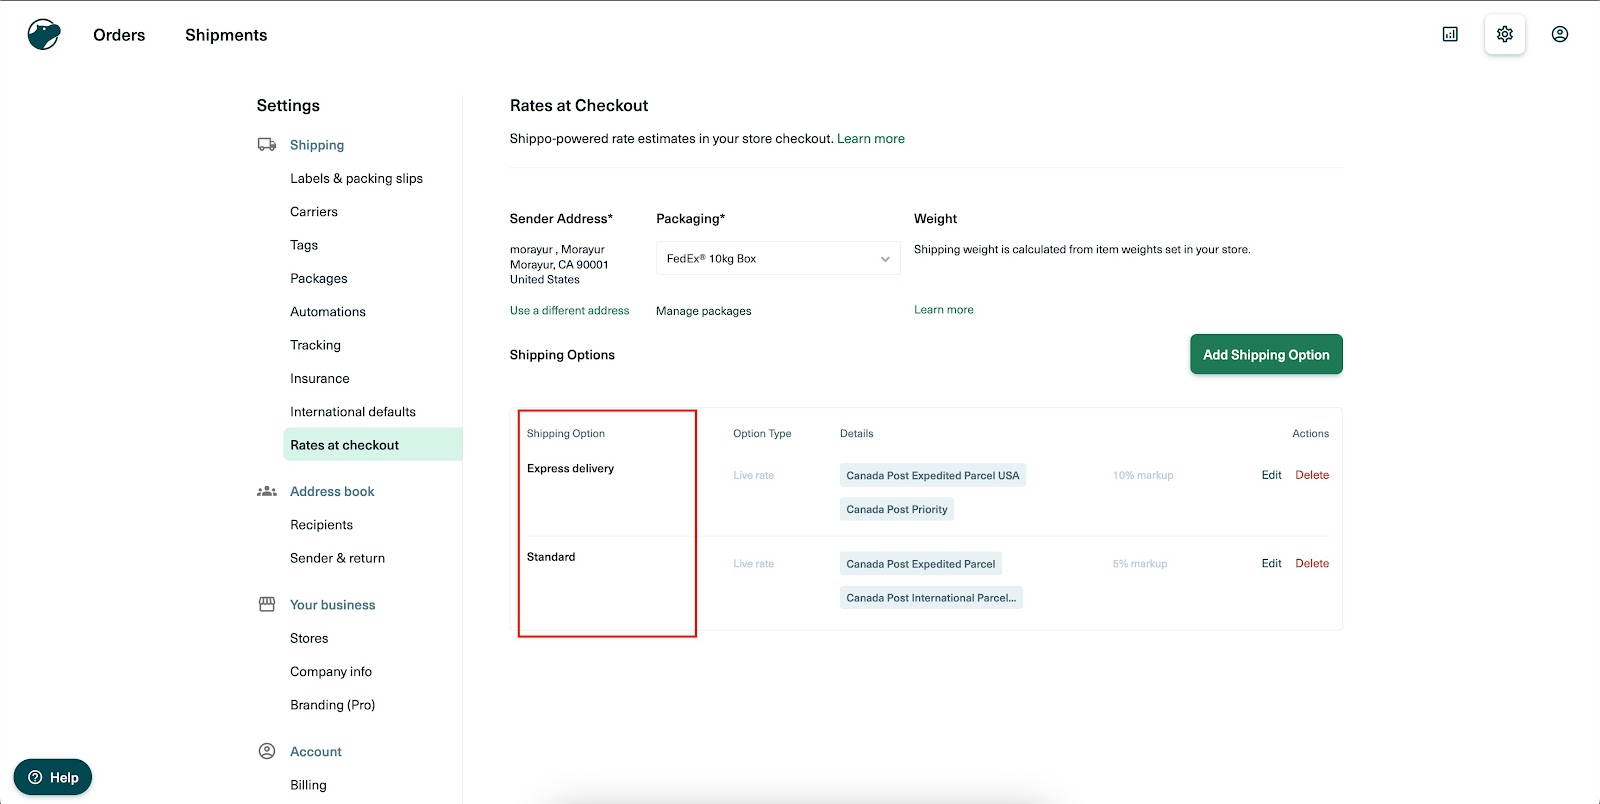
- Setup shipping options at : Settings > Shipping > Rates at Checkout > Add Shipping option
- Choose the Live rate option and select the preferred carrier services:
- Store owners can earn by charging markup fees on delivery. This will be add on charges on top of live rates. Store owners can either choose a percentage based or fixed markup. A fallback delivery fees value can be defined if live rates aren’t fetched.
- Live rates on checkout page will have the name mentioned under Shipping options


Step 3: Setup Shipping Origin in Shipping Settings
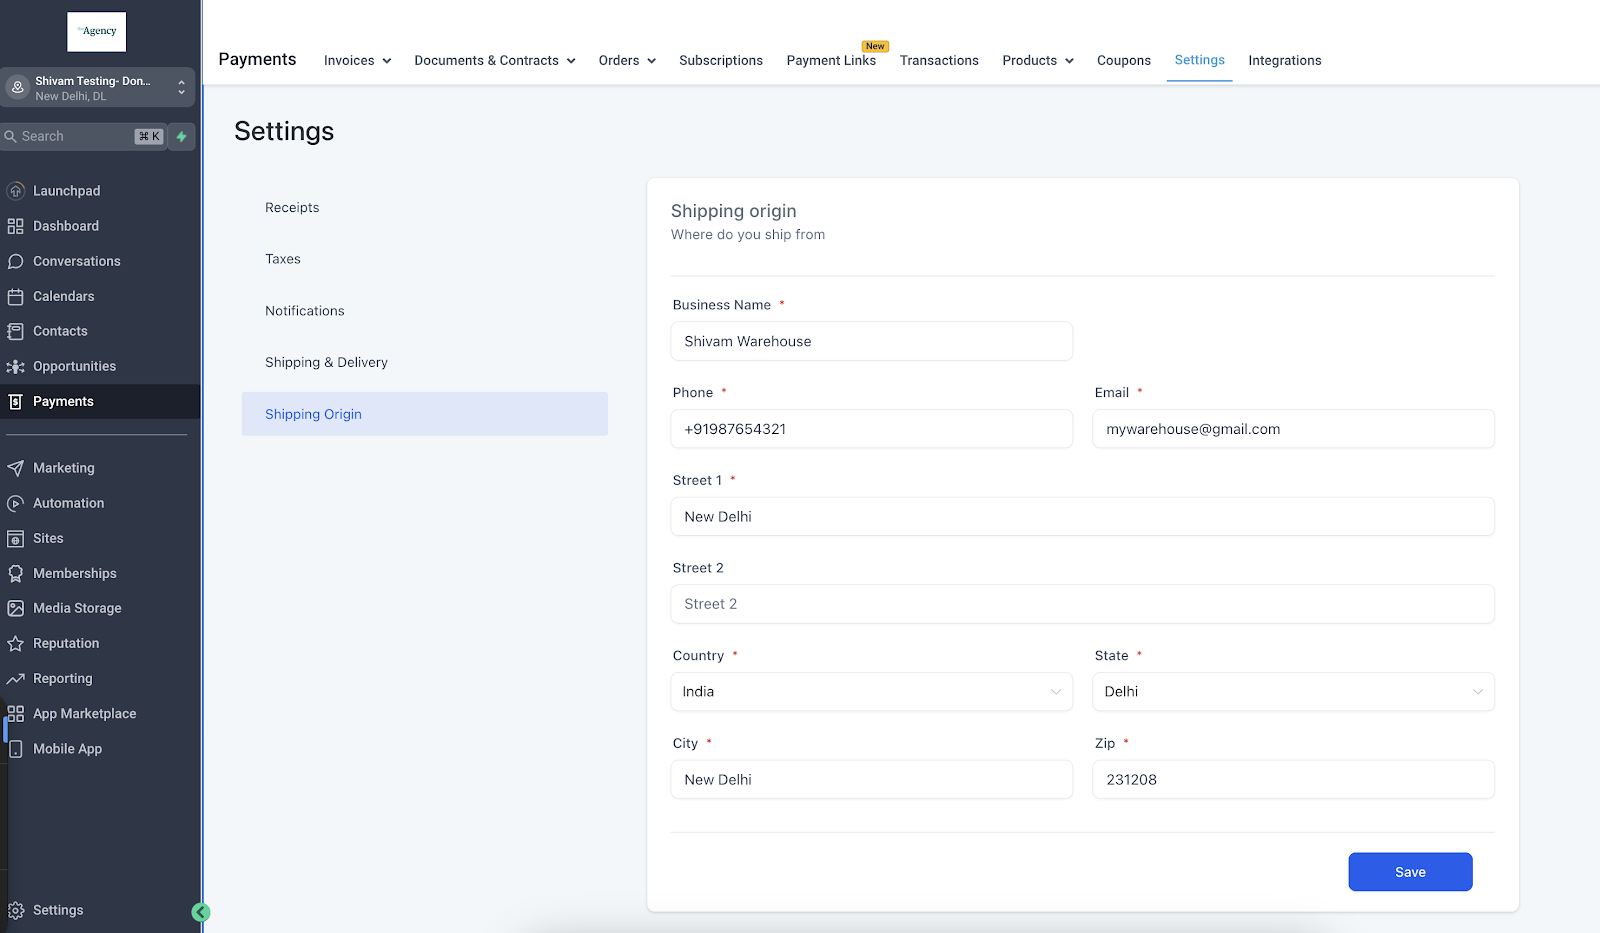
In your Ecommerce store payment section, set up the shipping origin which will be considered as Sender’s address while creating order in Shippo. This can be accessed at : Payments > Settings > Shipping Origin. Add details and save.
Note: It should be a valid address else there will be error in Shippo prohibiting from purchasing Shipping labels.
Step 4: Install Shippo app from marketplace
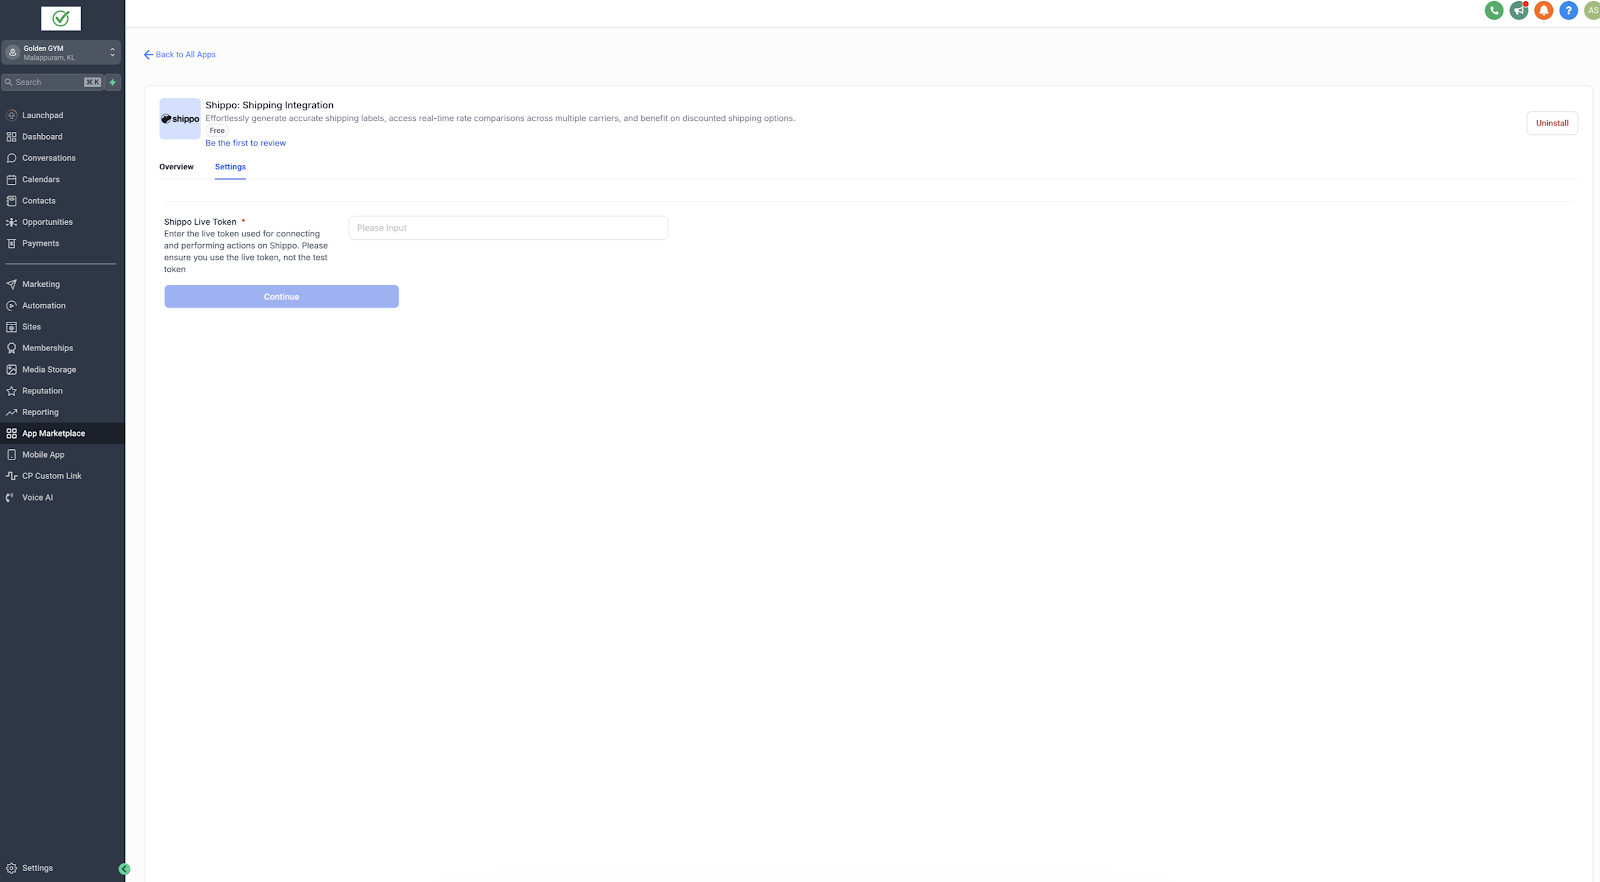
In the marketplace app or Integrations page (in Settings), search for Shippo and Install the application. Once installed, add the Live token to continue.
Step 5: Enter the Shippo live token & continue
- Enter the live token that was generated in Step 1:
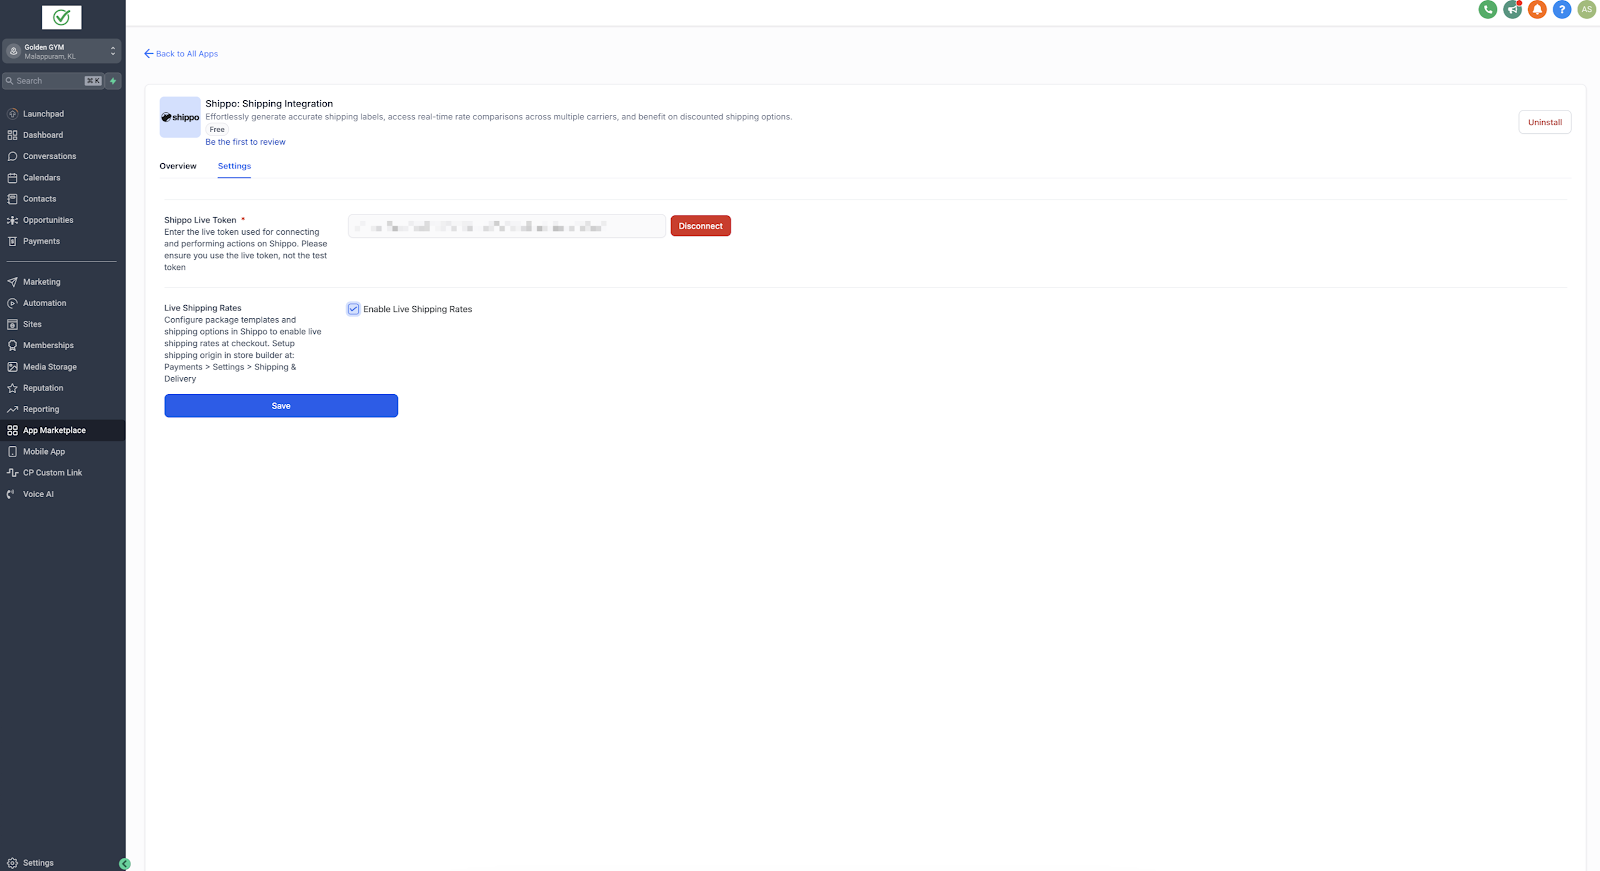
- Enable live rates in shipping after setting up the package template, Shipping origin and Shipping options in Shippo:
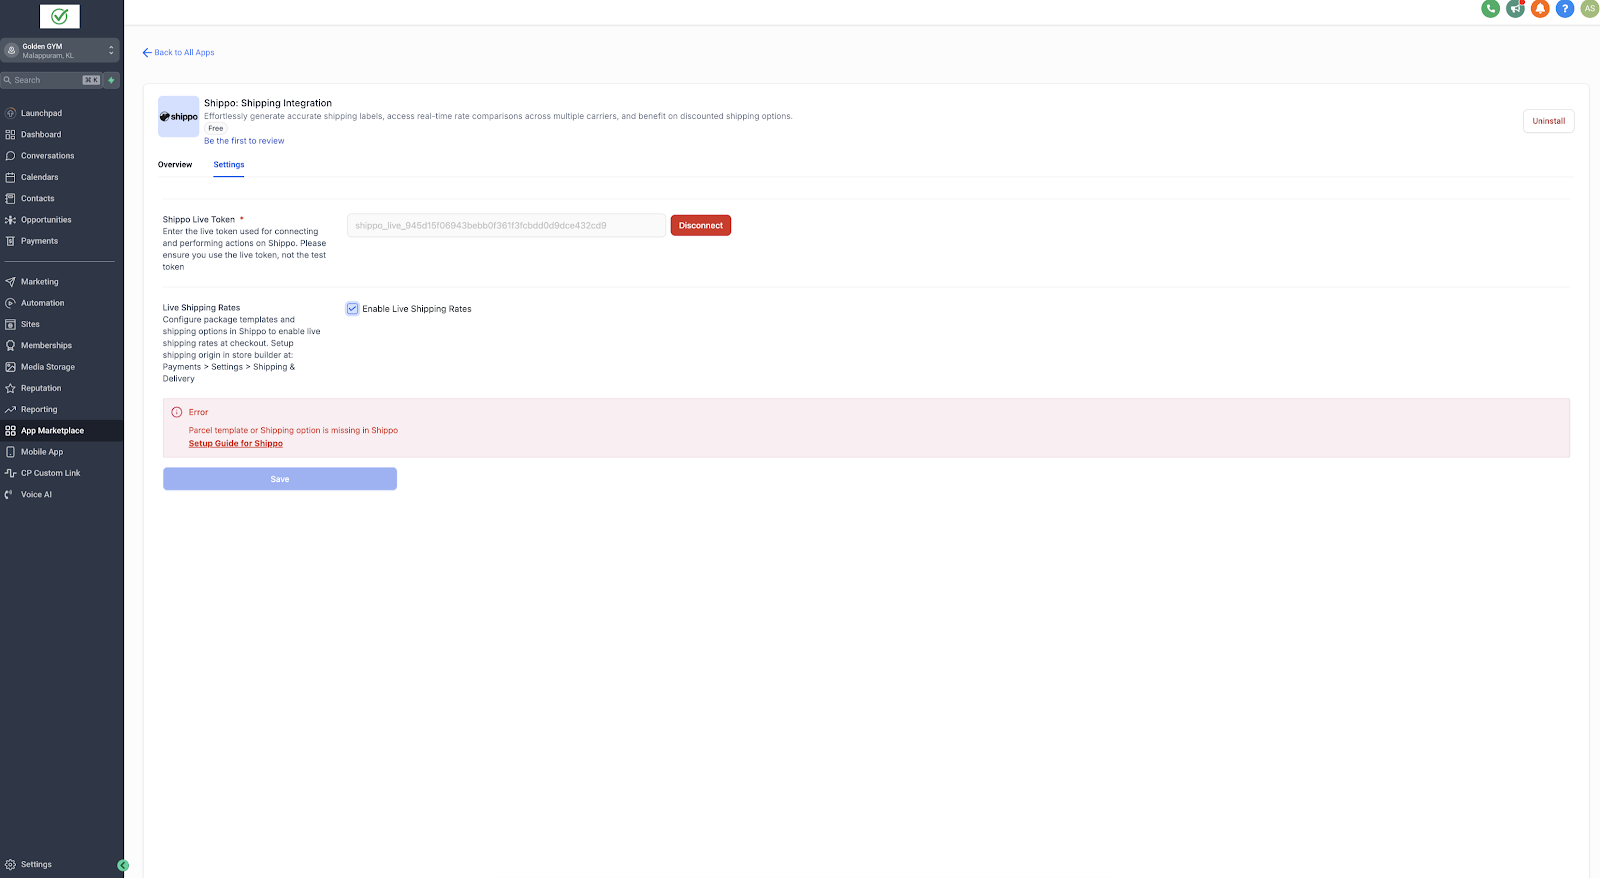
- If something is missing while setting up package template, Shipping origin and Shipping options in Shippo, following error will popup:
Step 6: Enable/ Disable live shipping rates
Shipping rates can be enabled and disabled by ticking and unticking the checkbox respectively. Post enable/ disable live shipping rates, click Save.
Keep learning